Vermont Sourdough with increased whole grain

You people might be tired of looking at these, but I’m still amazed every time I open the oven and pull one of these loaves out. I did that? This time I went with the Vermont Sourdough with increased whole grain from Jeffrey Hamelman’s Bread. And again, it’s about perfect. The rye flour in it doesn’t weigh it down at all. It does take some planning to produce a bread like this, but it’s totally worth it.

I enjoyed my first slices with a raw kale salad and marinated grilled tempeh. A pretty healthy lunch.

Vermont Sourdough

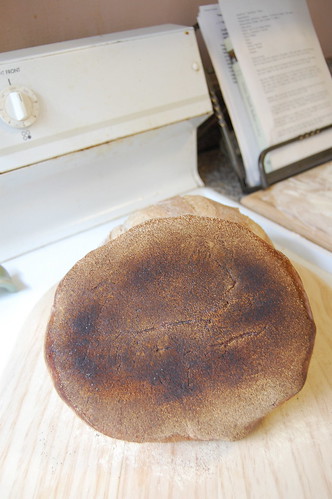
There was much more to baking day last Saturday than the Rustic Bread. It was time to jump back into sourdough. My first attempt was using my own starter which I ignored and then finally threw out because the smell freaked me out. I probably could have just fed it a lot and kept it going, but ended up ordering some starter from Northwest Sourdough instead. Also, I didn’t take into account my crappy oven so ended up with a pale top and almost burnt bottom. Hey, that’s what practice is for, right? Oh yeah, and my 2nd attempt was rising in the oven when I forgot it was there and preheated the oven. D’oh!

So, this time, I decided to make the same recipe, the Vermont Sourdough from Jeffrey Hamelman’s Bread using two different starters, Australian and Danish Rye. Just to see the difference and as an excuse to make even more bread. I mean, if you’re gonna heat up the oven for 4 loaves, might as well make it 6!

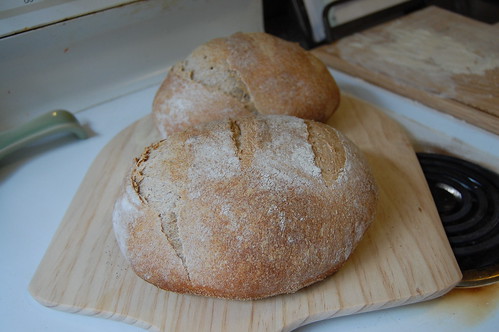
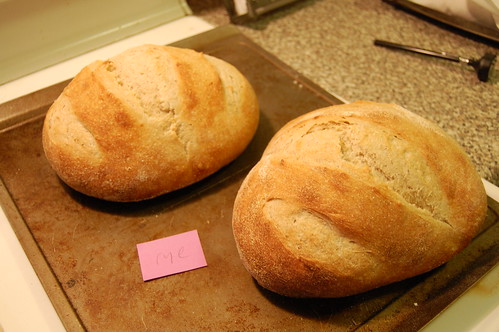
The difference between the two was subtle. In the end, I think the Australian wasn’t quite as sour. The rise and crumb seemed to be about the same. These are the loaves with the Rye starter, but the other looked about the same:

vermont sourdough rye starter

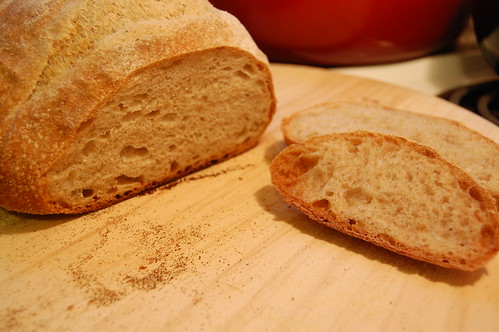
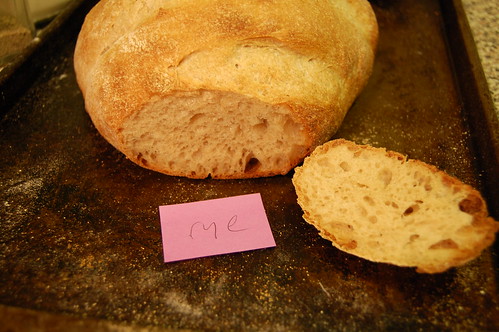
Here is the crumb from the Rye starter:

vermont sourdough rye starter

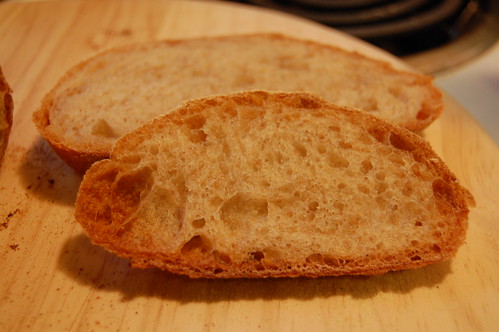
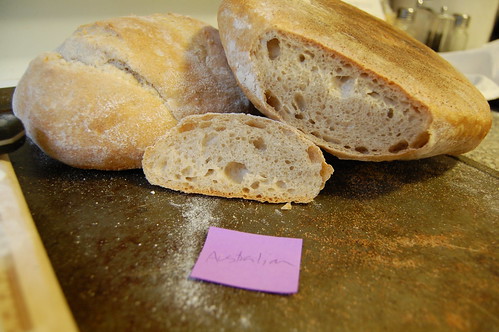
The crumb of the Australian starter. As you can see, I fear my oven going crazy and shooting up in temperature and burning my breads, so I have a habit of taking them out as soon as the internal temperature reaches 205-210 degrees F.

vermont sourdough australian starter

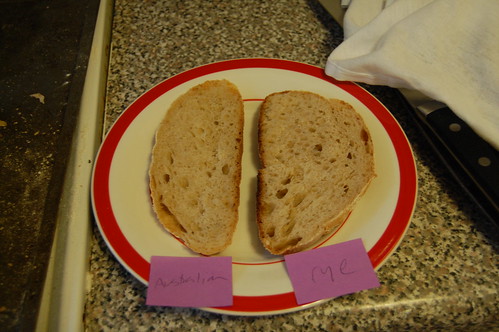
And here is a slice of each side by side. The Australian wasn’t actually flatter than the Rye, I was just further into the Rye loaf when these were cut.

vermont sourdough slices

All in all I was really happy with both. Obviously there’s lots of room for improvement, but I think I’m doing pretty well for someone that has no idea what she’s doing. 🙂 

How did I use all this bread? Gave a bunch away, of course. Ate it sliced with Earth Balance. Sliced with peanut butter. Toasted with EB alongside Lentil and Pastina Soup. Made French Toast with it and had with tofu scramble and obligatory green vegetable, broccoli. And had this morning toasted with EB and pomegranate jelly and with leftover scramble.

Coming soon, experiments in laminated dough, or, OMG I’m covered in Earth Balance. Ewww!

Rustic Bread

rustic bread from hamelman's bread

Saturday I made 6 loaves of bread. No really! And I was basically at it all day and into the night. But I really wanted to make the most of the day I had free so I packed in a lot of work. This one is the Rustic Bread from Jeffrey Hamelman’s Bread. It’s mostly a white bread with a bit of whole grain thrown in as well. I used both whole wheat and rye flours.

There are a number of challenges when baking artisan bread from home. The main one for me is my oven. I have an oven thermometer in there, but even so it’s about impossible to get it to stay at the temperature you want. The temperature likes to shoot sky high and then it’s really hard to get it to come back down. I’ve even found myself with the oven door standing open. And, I don’t know if this is true of other electric ovens, but the only time the top element comes on is if I’m broiling. So instead of getting an even amount of heat from the top & bottom, it gets all the heat from the bottom. So I have to watch like a hawk and keep adjusting the temperature to try and keep the bottom from burning before the top browns. See what I’m talking about?

rustic bread bottom

A touch darker than I’d like, but the char flavor is minimal and it was worth it to get the top right. Another thing my oven doesn’t have is an automatic steamer for the first part of the baking process. The method I used last time to achieve this was to preheat a cast iron pan in the oven along with my baking stones. When I put the dough in to bake, I poured hot water into the pan and used a spray bottle to spray the sides of the oven. I repeated spraying the sides of the oven a couple of times in the first 10 minutes of baking. I didn’t get good lift on those loaves and ended up with a practically burnt bottom and pale top. So this time, I tried something else. When I put the loaves in, I misted the top of each with the spray bottle, and check 3 or 4 ice cubes into the bottom of the oven. Then that’s it. Way easier and I think it worked better.

rustic bread from hamelman's bread

I found these loaves took a lot less time to bake than the 35 or so minutes given in the recipe. Looking at the comments in The Fresh Loaf post I linked to above, maybe I didn’t leave the dough wet enough. But the loaves registered somewhere between 200 and 205 degrees, and the bottom couldn’t take any longer in there so out they came. All in all, I’m really happy with these.

rustic bread from hamelman's bread

Submitted to Wild Yeast Blog’s Yeastspotting feature.