Deep dish pizza

Oh man. Click away if you’d rather not invest in fat pants. I always thought deep dish pizza might be difficult to make. The good, or bad, news is that it’s really easy to make.

King Arthur Flour puts out awesome recipes. They are rarely vegan, but veganize very well. I used this one for the pizza, substituting Daiya for the cheese, Earth Balance for the butter, vegan parmesan and Gutenfleischer’s pepperoni for the meat. And I added red pepper flakes to the tomatoes because pizza sauce should have some kick, damn it!

Now, don’t be afraid of yeast. If you’re having trouble with it, remember that it is temperature sensitive. Sadly, recipes like this one tell you to use lukewarm water, but many people don’t know exactly what that means. And it can affect your results. Here’s a handy chart of important temperatures related to yeast. Instant yeast wants to be mixed with 120°F water. It’s a good idea to check this with a thermometer since the yeast won’t act right if the water is too hot or too cold. But once you take care of that, the rest should work beautifully. Also remember that instant and active dry yeast are not interchangeable without some fiddling.

Another frustration when dealing with yeast is how much should it rise? Sometimes recipes give you an amount of time for the dough to rise and sometimes they tell you how much it should rise (double.) It’s best if they tell you both because the conditions in your kitchen are not going to be the same as the recipe writer. Maybe it’ll take 90 minutes for your dough to double. Then wait 90 minutes. If you don’t have a graduated container, mark double on the container you do have with a piece of tape and then you’ll know when it’s done rather than guessing.

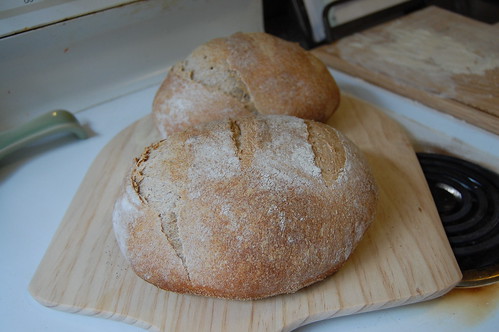
The crust came out really rich with all the fat in it. And it was nice and sturdy. You could even pick up a piece to eat it once you’d chopped off some of the point and gobbled it up.

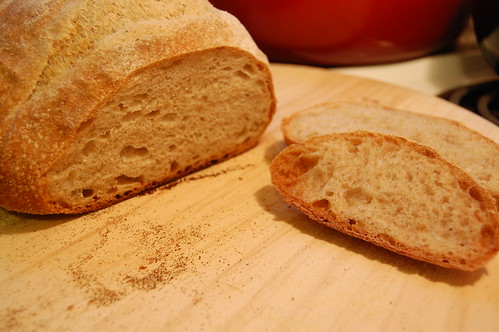
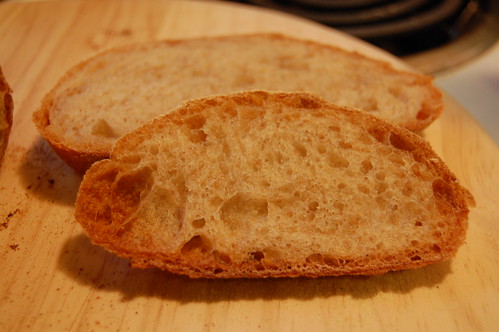
Now, for some more pizza porn. I used a coarse corn meal and you can really see it in the crust:

It’s been a while since I’ve submitted something to YeastSpotting, so here goes it!

Reviving dormant sourdough starter

So what happens when you take an active sourdough starter, stick it in the fridge and ignore it for 6 months or more? Apparently nothing bad. This is exactly what I did. Actually, I have 4 starters in the fridge. Last week I decided to try and revive the Italian starter and attempt a batch of bread.

How did I do it? I pulled the starter out, stirred the hooch in (the liquid on top) and put it on the counter in a new bowl. Leaving it on the counter, I fed it with half a cup of flour and half a cup of water twice a day. At each feeding , I poured off about half the starter into a container of excess. But I’ll get to that later.

Friday night I began the Vermont Sourdough from Hamelman’s Bread. Saturday morning I worked through the shaping and then retarded the two loaves in the fridge overnight. Then Sunday morning I baked them off one at a time on my pizza stone. The first loaf I steamed once with ice cubes. The 2nd loaf I added a second steaming. The second steaming seemed to give the 2nd loaf a little more spring. The taste was mild but clearly the starter did its job. Nice rise, good crumb. Chewy crust. Sourdough bread is such a process that it’s even more satisfying when it all goes well.

So there have been sammichs, bread slice snacks, bread with salad, etc. And I haven’t cut into the second loaf yet! So what to do with the cast-off starter created when feeding? There are a bunch of things you can do with it, but this time I chose scones. (Obviously, I veganized that recipe.) It really doesn’t act to rise the scones, but flavors them a little and keeps you from having to throw the excess in the garbage.

tempeh salad sammich
apple pie sourdough scones

It’s been a while, so I’m going to submit this post to WildYeast’s Yeastspotting. Head over there every Friday for a collection of baking porn from around the internets.

Rustic Bread

rustic bread from hamelman's bread

Saturday I made 6 loaves of bread. No really! And I was basically at it all day and into the night. But I really wanted to make the most of the day I had free so I packed in a lot of work. This one is the Rustic Bread from Jeffrey Hamelman’s Bread. It’s mostly a white bread with a bit of whole grain thrown in as well. I used both whole wheat and rye flours.

There are a number of challenges when baking artisan bread from home. The main one for me is my oven. I have an oven thermometer in there, but even so it’s about impossible to get it to stay at the temperature you want. The temperature likes to shoot sky high and then it’s really hard to get it to come back down. I’ve even found myself with the oven door standing open. And, I don’t know if this is true of other electric ovens, but the only time the top element comes on is if I’m broiling. So instead of getting an even amount of heat from the top & bottom, it gets all the heat from the bottom. So I have to watch like a hawk and keep adjusting the temperature to try and keep the bottom from burning before the top browns. See what I’m talking about?

rustic bread bottom

A touch darker than I’d like, but the char flavor is minimal and it was worth it to get the top right. Another thing my oven doesn’t have is an automatic steamer for the first part of the baking process. The method I used last time to achieve this was to preheat a cast iron pan in the oven along with my baking stones. When I put the dough in to bake, I poured hot water into the pan and used a spray bottle to spray the sides of the oven. I repeated spraying the sides of the oven a couple of times in the first 10 minutes of baking. I didn’t get good lift on those loaves and ended up with a practically burnt bottom and pale top. So this time, I tried something else. When I put the loaves in, I misted the top of each with the spray bottle, and check 3 or 4 ice cubes into the bottom of the oven. Then that’s it. Way easier and I think it worked better.

rustic bread from hamelman's bread

I found these loaves took a lot less time to bake than the 35 or so minutes given in the recipe. Looking at the comments in The Fresh Loaf post I linked to above, maybe I didn’t leave the dough wet enough. But the loaves registered somewhere between 200 and 205 degrees, and the bottom couldn’t take any longer in there so out they came. All in all, I’m really happy with these.

rustic bread from hamelman's bread

Submitted to Wild Yeast Blog’s Yeastspotting feature.